

My mom and I practiced the meringue mushrooms (using a recipe from AllRecipes.com - see below) the day after Thanksgiving while The Husband was out hunting. I realized I loved meringues, especially with a little chocolate in there.. light, airy, and crispy! The recipe is really easy and the fun part is detailing each mushroom with cocoa using simple tools to make the full effect.

Life has been extremely busy so I didn't actually have a recipe picked out for which yule log I would bake the night I was going to start it. I kept looking online and either the logs were ugly or had horrible reviews for cracking while rolling, bad taste, soupy, etc. I eventually found a short-cut recipe for using a box cake, and I thought "fabulous.. I'm a working woman, I'd rather spend time making it detailed to look like a log than bake a from-scratch sponge cake." Box cakes always at least taste good and come out well every time. I picked up some Betty Crocker SuperMoist boxes and made them in my 12x17 jellyroll pan. What I thought was the tricky part (the rolling) turned out to be no problem, I rolled one short-end to short-end and one lengthways, to create my log and branches.

The recipe said to let the cakes cool while rolled, and then fill later. This was a big mistake and if you ever try this: FILL AND THEN ROLL right out of the oven after cooling a few minutes. Cakes don't like to dry rolled up, and then be unrolled afterwards... as seen in this photo I took at 7:30pm the night before this cake was "due."

While the box cake rolls were cooling, I took the time to whip up the mushrooms and bake those so they could also cool off. This is a pretty simple recipe, this one in particular from AllRecipes.com. I had better luck at home with my KitchenAid (than I did with my mom) getting enough air into the meringue so I was able to get several "stand-up" stems for the mushrooms.

Instead of giving up (my mom's advice), I ran out to Kroger at 8pm to get special ingredients for a "from scratch" sponge cake. I was a little nervous about this because I don't typically make cakes from scratch and a sponge cake is not your run-of-the-mill recipe. I found a random recipe online that had a lengthy description of how to master this so I decided to trust it though I have no idea who that person is. I followed the directions to a T and lo-and-behold! The sponge cake rolled.

I filled it right after it was out of the oven (as noted above in lessons learned), so the roll was complete and ready to pop into the fridge!
 I made a white chocolate buttercream frosting for the filling (see recipe below). I thought it might be the "long lost white frosting I love" but it wasn't. However, it was quite delicious with chocolate cake. I had some left over and used it on the box cake to try and salvage enough to create the branches of my log. I had seen many pictures online and I knew exactly what I wanted in a branch - a thinner roll than the log itself, one coming out the top and one longer one coming out of the side. No offense, but many online were super ugly... at least it helped me decide what I'd do different.
I used Wilton's recipe for Chocolate Decorator's Icing (a buttercream 'sturdy' enough for holding its shape) and decided to spike it with some coffee. I loved the way it turned out, a deep, chocolatey flavor with a hint of espresso.

It was a perfect color for tree bark (I was concerned it would be a light-tan) so I was also excited about that!

It took me into the wee hours of the night (1am ish) but I finally got the chocolate frosting covering all the portions (almost ran out... so much for the 'extra cake' I was going to make for hubby!) and used a knife to draw the bark-like lines from end to end. The frosting could've been a little more moist, so extra time was spend trying to smooth out my lines. I eventually realized a rough-look was helping with the realistic goal, however. I added some of the leftover white filling into the chocolate frosting to make a lighter colored end so it looked like the log had been sawed off. Many pictures I found online did this in a different way - either all covered in "bark" or in a spider-web design, both of which I think looked lame.. er...I mean, .. unrealistic. haha This was easy and worth it, in my opinion.

Once the bark was done, I let it chill in the fridge and finished up the mushrooms by attaching the stems to the tops, (puncturing a hole with a knife, and using melted chocolate chips as glue) and decorating the bottom webbed portion (powdered baking chocolate and a toothpick) and dusting the tops with more powdered chocolate. Meringue will absorb any moisture in the air so I kept them in an air-tight zip loc bag for over night in hopes to keep them crunchy (and they were).

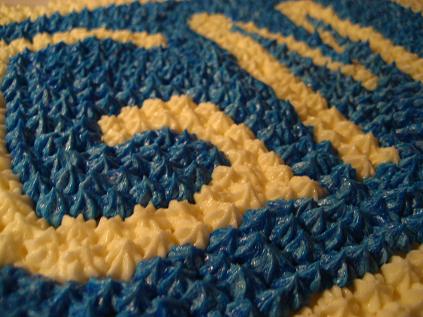
I called it a night and knew I could muster up enough time to create vines, berries, and the finished look prior to the party at 12noon the next day. In the morning --- first things first, I mixed some white decorators icing (had reserved some prior to making it chocolate/coffee for the bark) with green food colorings to create a nice leafy green color. I used a small round tip to create the lines and spirals.

I had a second frosting bag with the rest of the green frosting but used a leaf tip to create the leaves. They were both easy to do, after some trials on a paper plate.

The brown log already looked better with a splash of green.

Next, I wanted to add some bright red and I created berries to attach near the vines. I used a large round tip and actually pressed that into a marachino cherry to get the look that I wanted.

I only used a few cherries and used green frosting to afix them in trios where I thought they would look nice. One fun thing was that I got to create this log however I wanted, so my vines and mushrooms and berries can grow where I choose!

The next step was to get the mushrooms involved....

I used more melted chocolate to attach the mushrooms to the cake if they wouldn't just stick into the frosting on their own. I even had some just "growing on the forest floor" on the cake board. It was fun playing "forest god" and making all the decisions.

The rest went into a blue (washed and lined) mushroom basket that I got from the grocery store, to add to the realism of "picking mushrooms in the forest." I did get one comment from some one thinking the mushrooms were real so that made everything worth while!
 The mushrooms held up really well for the entire weekend.
I tried not to use too many mushrooms on the log, no one wants a fungus-y cake.... ha.... ha.

The final touches came by dusting the top of the log with powdered sugar through a seive and glueing real evergreen snips to the corners of my cake board. (I had a 1/2 sheet cake board covered with a paper liner that I bought from a cake supply store).


I was extremely happy that the cake made it to its destination in great shape. It didn't budge in the car, even though I had to turn around part of the way there because I forgot the mushrooms and it was freezing rain. I drove extremely slow!

I thought the cake looked especially nice in the lighting at my mother-in-law's house.

Thank you for joining me on my buche de noel adventure. If I ever made one again, I think I'd try the cake box again and just fill as soon as it's out of the oven (maybe letting it cool for 5 minutes). I think this method would work and be fastest and taste best. The spongecake was not my favorite - a little dry and eggy flavored. The box cake was good, as usual. See below for recipes!


Meringue Mushrooms
(as seen on AllRecipes.com)
INGREDIENTS
1/2 cup egg whites
1/4 teaspoon cream of tartar
1/4 teaspoon salt
1 teaspoon vanilla extract
1 cup white sugar
1 tablespoon unsweetened cocoa powder
4 ounces chocolate confectioners' coating (or semi-sweet chocolate chips)
DIRECTIONS (my additions are seen in bold)
Preheat the oven to 225 degrees F (110 degrees C). Line 2 cookie sheets with parchment paper or aluminum foil.
In a large glass or metal bowl, use an electric mixer to whip egg whites until foamy. Add cream of tartar, salt, and vanilla. Continue whipping until the whites hold soft peaks. Gradually sprinkle in the sugar so that it does not sink to the bottom, and continue whipping until the mixture holds stiff shiny peaks.
Place a round tip into a pastry bag, and fill the bag half way with the meringue. To pipe the mushroom caps, squeeze out round mounds of meringue onto one of the prepared cookie sheets. Dip your finger in water and pat down the pointy tips that result when you pull the tip away from the mushroom cap. Don't worry about doing this with the stems, that part can be cut off or inserted into the cap. For the stems, press out a tiny bit of meringue onto the other sheet, then pull the bag straight up. You can also make "laying down" stems. Do not worry about making all of the pieces exactly the same. The mushrooms will look more natural if the pieces are different sizes. Dust the mushroom caps lightly with cocoa using a small sifter or strainer(I didn't do this, I prefer to dust on cocoa after they've baked)
Bake for 1 hour in the preheated oven, or until the caps are dry enough to easily remove from the cookie sheets. (I baked for close to 2 hours at 200F Set aside to cool completely. Melt the coating chocolate in a metal bowl over simmering water, or in a glass bowl in the microwave, stirring occasionally until smooth.
(This is where I dusted bottom of caps with cocoa and used toothpick to make lines like "webbing" originating from the center and also dusted tops of caps). Poke a small hole in the bottom of a mushroom cap(I used a knife). Spread chocolate over the bottom of the cap (in the hole, I used a wooden skewer). Press tip of stem lightly into the hole. When the chocolate sets, they will hold together. Repeat with remaining pieces. Store at room temperature in a dry place or tin.
 White Chocolate Butter Cream Frosting
(as found on RecipeZaar)
Ingredients
1 cup butter softened
2 cups confectioners' sugar
6 ounces white chocolate or white baking bar, melted and cooled
3-5 tablespoons whipping cream or half-and-half

Directions
1. In a large bowl, beat the butter and confectioners sugar at low speed until fluffy.
2. Add in melted and cooled white chocolate and whipping cream (start with 3 tablespoons and add in more to achieve desired consistancy).
3. Beat on high speed for 3-4 minutes, scraping the bowl with a spatula.
 Buttercream Icing (Wilton.com)
(specifically used for decorating cakes)
Note: Medium Consistency
Ingredients:
1/2 cup solid vegetable shortening
1/2 cup butter or margarine, softened
1 teaspoon Clear Vanilla Extract
4 cups sifted confectioners' sugar (approx. 1 lb.)
2 tablespoons milk
Directions
In large bowl, cream shortening and butter with electric mixer. Add vanilla. Gradually add sugar, one cup at a time, beating well on medium speed. Scrape sides and bottom of bowl often. When all sugar has been mixed in, icing will appear dry. Add milk and beat at medium speed until light and fluffy. Keep bowl covered with a damp cloth until ready to use. For best results, keep icing bowl in refrigerator when not in use. Refrigerated in an airtight container, this icing can be stored 2 weeks. Rewhip before using.
YIELD: Makes about 3 cups.
I reserved about 1 cup for my green vines and leaves.
The rest was turned into chocolate/coffee flavor by adding 3/4 cup cocoa or 3 oz melted unsweetened chocolate squares and 2 more tablespoons of milk.
Sponge Cake Roll Recipe
(chocolate was not great tasting but it did roll OK)
This was one of the few recipes for my 11x17 pan that I had on hand. Used recipe as seen in a very detailed website: Ellens Kitchen
Box Cake Yule Log Recipe
(this is the one I used but I do not recommend the method of rolling, cooling, and unrolling. I would use again but just fill and roll 5 minutes out of the oven).
Betty Crocker's Christmas Cookbook recipe
It looks so pretty! Thanks for sharing your ideas!
ReplyDeletewow, great looking cake!
ReplyDeletebeautiful cake. I have admired this cake in books, your cake looks fabulous!
ReplyDeleteI have been searching for a nice, detailed, and honest recipie/experience of making a buche de noel. I love mushrooms and yours are so beautiful, i'm so glad i stumbled apon your blog.
ReplyDeletethank you
^_^