
My First Daring Bakers Blog

The Daring Bakers is a food-blogging "club" with over 1000 members (and growing) who love to try new recipes and blog about them! Each month, a challenging baking-related recipe. I mean.. challenging. Like 4 pages of instructions (at least for this recipe!) -challenging! I'm definitely the "dress up a box cake" type of person, but I thought it would be a good experience to learn a few "from scratch" tricks.
After digesting the recipe for a few days, I tried to explain it to my mom when I got home from my camping trip but apparently the raccoons got to me, and I told her it was a "Gilbert Gateau".. and to make matters worse, she heard "Gilbert Ghetto" (but I know I didn't say that, in reality. Gilbert yes.. Ghetto, no.). Anyway, I had never heard of Filberts but - turns out they're just hazelnuts! Oh, and a gateau is like a genoise (which is a sponge cake.. see notes in my Yule Log post), except a gateau is more dense because of the nuts ground up into the flour. As a side note, it was sorta funny to see the past recipes of the Daring Bakers. In December 2007, they were making a yule log too!
The recipe for this cake was seriously long. When everyone else posts their posts (We all have to post on the same day!!) - I'll link to some one else who typed out recipe. (Here it is - thanks to our host this month - Mele Cotte) I wasn't exactly very excited to try this recipe, to tell you the truth .I just did a ganache cake last month for Chris' birthday, and here we go again - another ganache. Still, I wanted to make sure I could hang with these "Daring Bakers" so I went along.
I'm glad I did!
In case you didn't peek at the recipe, there were several different steps, which I will point out. You know this is a darned tricky recipe if the top recipe has 5 additional recipes hidden inside of it, i.e.:
Filbert Gateau with Praline Buttercream
From Great Cakes by Carol Walter
1 Filbert Genoise
1 recipe sugar syrup, flavored with dark rum
1 recipe Praline Buttercream <--- (this also had a hidden recipe for Swiss Buttercream in it!) ½ cup heavy cream, whipped to soft peaks 1 recipe Apricot Glaze 1 recipe Ganache Glaze, prepared just before using 3 tablespoons filberts, toasted and coarsely chopped
. . .
I split this project into 3 evenings after work during the week where The Husband was on his fishing trip, so it worked out great - no one was there to wonder where dinner was. Plus he doesn't even like nuts... so he would not have seen all the trouble as "worth it" - for him. :)
The first night, I had to search all over to find hazelnuts.. they're expensive.. I spent $15 at Whole Foods and did have some extra. This was a pretty expensive cake to make, with the nuts, cream, chocolate, and eggs. Still, I had fun learning some new techniques.
That night, I had to "toast" and "peel" said hazelnuts. This was quite annoying and took an hour and a half. About 20 minutes to toast on a baking sheet in the oven, and the rest of the time standing at the counter hoping to rub off the stubborn skins, getting the skins all over my freshly-tidied kitchen. Turns out, I probably didn't have to get them as "perfect" as I did but I was really trying to follow the recipe 100%.
The next night, I needed to make a hazelnut praline paste. Oh, you've never done that? ME EITHER. This included heating sugar in a pan slowly and then when it melted, adding the nuts to coat. I turned it out onto a greased pan (see below) and let it dry into a brittle.

At this point, I tasted a few stray caramel nuts and... yummo! as Rachel Ray would say. I was starting to get excited about this "Praline Buttercream". One thing that was really neat about this challenge was that it forced me to get out my big food processor, the Cuisinart that I got for our wedding. It was the last gift that was still in its box. It wasn't that I didn't want it, I knew I'd be using it and it'd last my whole life, but I had avoided it thus far. There was no other way to pulverize nuts and brittle into a smooth paste without this baby, and I was happy to finally take it for its inaugural test run.

Here you see (above) the processed brittle which was coming into a "paste" form. This is the "Praline Paste" which was to be used in the Praline Buttercream (you mix it into the Swiss Buttercream).

The next night was a big one. I started out by making the cakes (processing 1.5 cupz of hazelnuts into the batter) - I used 8in cake pans and split the batter into a 2/3 vs 1/3 proportion, so I'd only have to split the 2/3 cake in half to get my 3 layers. This worked out really well.
Then, since the cake went so well, I decided to make the Swiss Buttercream. Above you can see some slowly cooked and whipped meringue about to be blended with some butter.
This was my first time making Swiss Buttercream and it was pretty good. Light and airy. This is not my "long lost favorite white frosting recipe" I'm always looking for, so I'm glad to cross it off the list and probably never make again. Decorating buttercream is way easier, while a little more rich, I prefer it. The praline paste added to the swiss buttercream was pretty good. I think I preferred the two ingredients by themselves better, but.. it was quite a tasty frosting.

Ah-ha! I knew that if I got up to the "glazing" stage, I'd be able to wrap and refrigerate until the final steps - ganache and decorate - so I wanted to get this done and take the next night off! Here (above) you see my three layers ready to go, along with my simple syrup, and apricot glaze. Also ready were the praline buttercream and whipped heavy cream (geez, how many fillings do we need???) --- all ready to go. Actually, the fillings were necessary to keep this cake moist - it's dense and spongey which is not the same type of american-style cake that we're all used to, i.e. box cakes!

Here we are applying the praline buttercream on top of the sugar-syrup glazed layer, and then spreading a small layer of whipped heavy cream. With all these egg whites and frostings and such, you can see I had to use my KitchenAid (and wash it) over and over and over again for 1 recipe. Annoying! :) I wonder if they make "2nd bowls" to use for swapping in and out.

Here is the cake all layered up and ready to go. I was glad my 2/3 and 1/3 estimations seemed pretty good. This was the first time I split a cake. I used toothpicks to mark the "halfway" points on the 2/3s cake, and then spun the cake around against my knife. I should really invest in a turn table.

Next I trimmed the edges of the cake because I had heard it's tricky to make the sides look smooth. I think trimming it made it worse off. I covered it in the apricot glaze and it was ready to be refrigerated for a while. I tasted the trimmings and.. the apricot glaze was delish, and the cake was OK and I had no idea how the chocolate would taste with all these crazy flavors and liquors and such. Finally on Saturday, right before my mom stopped by to taste-test, I got to the ganache portion of the recipe.
I wasn't too nervous because I just did ganache, though my previous recipe was different (no corn syrup or vanilla), and it turns out - stick with the original recipe of just chocolate and cream! I hated how thin this ganache was, it didn't allow for any "fill in the blanks" for the sides of the cake, and if I were to have left it at room temperature, it would have never hardened.

Needless to say, I ended up with lumpy sides like many of the other Daring Bakers. No worries, I wasn't going to let this ganache get the best of me. I decided to use my spatula and make little spikes all along the edge of the cake to hide the lumpy layers and give it a neat little finish. Sorta like chocolate waves of the ocean.

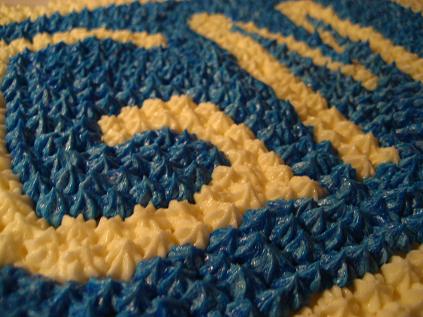
Then since I only had about 15 minutes to make some sort of buttercream decoration on top (was part of the RULES), I pretty much just did something similar to what the recipe described. I used a #114 double ruffle tip and made a little design.. and voila! It was done.

The buttercream was very light and not super easy for decorating, and the added praline paste in the buttercream actually made for some lumps coming through and clogging the decorating tip. So, it was not as sleek and perfect as I would have liked but, the ruffles turned out OK enough.

My momma came over and had a piece and declared this to be "just like a real european torte" and she loved it. She's always been a fan of layered cakes with different extracts and jams and all sorts of interesting combinations, so this was right up her alley. Also I had some lovely ladies over for a sandwich lunch, and when given a few options for dessert they also tried a piece of cake. I think the consensus was that it was pretty good. For the piece I tried, my take was - this is pretty good, and offered a very unique combination of rich flavors. This is not my favorite style of cake nor my favorite anything so I would not request this for my birthday cake, however, it was still taste for what it was.

So, that took care of about half the cake and the other half went directly to work. If my monthly Daring Bakers projects are going to be too much to handle at home, I will be spoiling my coworkers with the rest! So, that's the end of my first Daring Bakers task. Yay!


Needless to say, I ended up with lumpy sides like many of the other Daring Bakers. No worries, I wasn't going to let this ganache get the best of me. I decided to use my spatula and make little spikes all along the edge of the cake to hide the lumpy layers and give it a neat little finish. Sorta like chocolate waves of the ocean.

Then since I only had about 15 minutes to make some sort of buttercream decoration on top (was part of the RULES), I pretty much just did something similar to what the recipe described. I used a #114 double ruffle tip and made a little design.. and voila! It was done.

The buttercream was very light and not super easy for decorating, and the added praline paste in the buttercream actually made for some lumps coming through and clogging the decorating tip. So, it was not as sleek and perfect as I would have liked but, the ruffles turned out OK enough.

My momma came over and had a piece and declared this to be "just like a real european torte" and she loved it. She's always been a fan of layered cakes with different extracts and jams and all sorts of interesting combinations, so this was right up her alley. Also I had some lovely ladies over for a sandwich lunch, and when given a few options for dessert they also tried a piece of cake. I think the consensus was that it was pretty good. For the piece I tried, my take was - this is pretty good, and offered a very unique combination of rich flavors. This is not my favorite style of cake nor my favorite anything so I would not request this for my birthday cake, however, it was still taste for what it was.

So, that took care of about half the cake and the other half went directly to work. If my monthly Daring Bakers projects are going to be too much to handle at home, I will be spoiling my coworkers with the rest! So, that's the end of my first Daring Bakers task. Yay!

Hey kitchen bliss
ReplyDeletethat's a nice work with lot of effort and heart..the effect is appealing !
Congratutions on your first challenge and welcome!
ReplyDeleteThanks!!
ReplyDeleteWelcome to the Daring Bakers! I think your cake looks amazing, especially for being under the gun!
ReplyDeleteGorgeous job with the frosting!
ReplyDeleteNice job! But 4 pages? Maybe if you used a 5 point font! Welcome to the group :)
ReplyDeleteTwo words... beautiful cake. I simply love the pictures you took of the step-by-step cake making process. The praline looks soo tasty and your layering is perfect. Way to go on your first DB challenge... rock on!
ReplyDeleteI love what you did on the side, great idea! Your cake looks amazing!
ReplyDelete