

A perfect opportunity to try out the "frozen buttercream transfer" method of decorating a cake was my nephew's 3rd birthday. He loves Mickey Mouse and I saw a lot of great Mickey birthday cakes on cakecentral.com, so I decided to finally try out this new frozen buttercream transfer thing.
You can do this for any kind of intricate or character design that you can print out a template for - and it's pretty handy because you can do it in advance. I found a free coloring book image of mickey mouse with some balloons (as seen here... took me a while to find this so I hope this helps!) I reversed it and then printed it out in the size that worked for me. It fit nicely on a 10x10 square cake.
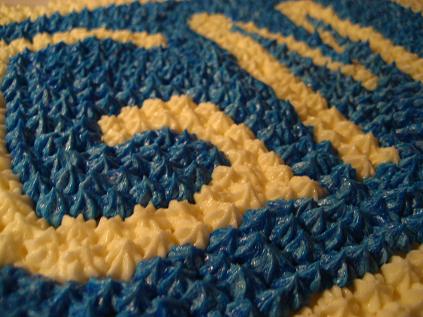
The idea is to put your reversed printed out template underneath some parchment paper so you can see through it. Start with the black outline color (I bought all my vivid colors because we can't have Mickey with gray ears and pink trousers!) and with a small decorating tip (size #2 or so), outline everything on the parchment paper. Then start filling in the colors - start with the colors that would be on TOP of the cake (you have to think of this backwards...). For instance, after the black outline, you have to do the white buttons before doing the red trousers because you'll eventually flip this image over and what gets frosted first will be on the top.
I filled in the eyes, gloves and buttons in white, yellow balloon, shoes and hat portions, then I did the blue balloon and hat, red tongue and trousers and then the skin tone last. And because I didn't want an edge around the mickey image, I decided to just transfer the entire top of the cake so I did a big layer of white which was my cake's background color. I'm not sure I'd do this again - you could definitely see the piping lines. I think it was hard to smooth the icing also, so I may have had my icing too thick. I also had problems with the black outline moving around as I filled in different colors, and as you can see some of the blue bled over the lines and there were some other imperfections like that. Overall, I think my nephew recognized it was Mickey and was happy so that was the main thing.
After you get all of your buttercream drawn out, you slide the parchment onto a baking sheet and freeze it. I froze mine overnight but you can do so for longer. I baked and filled and crumb coated my cake and I also had the sides done already. I then took the frozen transfer out of the freezer and flipped it upside down onto the cake, centered it, and peeled off the parchment. Actually it was solid and it came off in a block and the parchment slipped right off, so that part was easy.
The buttercream starts to come to room temperature where I tried to smooth out the edges and round them down to match up with the sides. I should've leveled my cake better so I had to prop up some of the transfer with more frosting and tried to smooth it out. It worked out OK and I would definitely try the frozen buttercream transfer method again.
I used the following blog tutorial with how to do it and I highly recommend going there instead of using my silly instructions above. It was very helpful!
Helpful Frozen Buttercream Transfer Tutorial on Soggy Cheerios
Looks good Anne - I am sure Jackson loved it. Good job trying new methods and adding to your skill set :)
ReplyDeletebtw, I didn't realize that Mickey was British and wears trousers
ReplyDeletehaha he sure is Megan.. he sure is. Thanks for checking out my updates. :)
ReplyDeleteThat looks great!! I am doing one with "My little pony". My only worry is the image cracking after freezing it, when I flip it over onto the cake. I have done a very small BCT before like only 2 inches in size. The ponies will be much bigger and I am so worried they will crack...does it really freeze really hard? Thanks!!
ReplyDeleteSally - it freezes very hard! It does thaw to room temp pretty fast however if you have a nicely leveled cake, I don't think you have to worry too much about cracking - make the transfer nice and thick and dig it into your top coat of frosting! Good luck! I am sure it will be great!
ReplyDeleteThanks so much!!! I love your cake pics!! Awesome job!!!
ReplyDeleteLove your blog! And I wanted to personally invite you to be one of the top cooking Advisors on ShopSquad, a free shopping advice website where shoppers and your readers can ask Advisors (i.e. you!) for advice.
ReplyDeleteIf you recommend something that is purchased, from cookware to appliances to wine, you get a percentage of the sale. You're already sharing your expertise through your blog, so why not earn more money for it? You can also earn $5 for each of your readers who signs up.
Read our great press coverage (http://www.shopsquad.com/about?vsrc=cook110) or learn how ShopSquad works (http://www.shopsquad.com/howitworks?vsrc=cook110). When you're ready, sign up free at www.shopsquad.com.
Feel free to ask me any questions: marshall@shopsquad.com. Thanks!
Did you do all of the little dots and swirls on top of the transfer or were they part of the transfer. I am excited to find your explanation because this is the exact picture of Mickey that I had chosen to do.
ReplyDeleteThe iPad really is a problem when trying to do comments. I also wanted to say thanks for a great explanation and pictures. They are so helpful. I have seen the transfers and have been intrigued but wasn't sure that I liked the idea of the really thick transfer sitting on top of the cake. I like the idea of doing the whole top and transferring. Guess I will have to play around with it.
ReplyDeleteHi...it looks great, may be next time you can try keeping it in fridge for a while after you do black outlines..this way it should prevent black outline moving around problem..
ReplyDelete