
I recently had the honor of creating a wedding cake and a groom's cake for the wedding of one of The Husband's best friends, Clay, and his fiance Sarah. There were a number of challenges with this project, first and foremost - I've never made a wedding cake or groom's cake before!!!

Second, Clay thought maybe a lobster cake with red velvet would make an awesome groom's cake. I agree it sounded great - and maybe a little unusual, you might think, but Clay is living in Maine for a few years and Sarah will be joining him right after the wedding to live in Portland. Also, you might not know but the most common groom's cake is an Armadillo (Anyone see that movie??). I didn't have a groom's cake (looking back I should've, I was not interested in cake decorating yet then), as it was not customary in my family. This tradition hails from the south, and a groom's cake is a gift from the bride to the groom, and it is usually a non-white cake that has a bright and vibrant theme of one of the groom's hobbies or interests.
So lobsters.... they are a tricky shape and that was challenge number 2. The third and biggest challenge was the location of the wedding - Iron River, Michigan! It's no less than an 8 hour drive from our house in Troy into this far west region of the Upper Peninsula, but we were so excited because we love the UP and we knew it would be a fun trip.. I just had to get the cakes up there safely!

For the wedding cake, Clay and Sarah left it totally up to me so that made it very easy. I decided to go with a 12 inch round circle for the bottom layer and a 7 inch for the top layer. This wasn't your typical "wedding cake order" and the story was that they originally were not going to have a cake and do other desserts, but then they hoped to have one at least for pictures,.. so this was pretty low pressure for me. A perfect time to try it out!

So due to the interesting logistics involved with this project, I had to have a game plan. I thought I might be out of town the weekend before so I had to do some things in advance. I decided to make the cakes in advance and freeze them in separate layers. This is the first time I did this but I read about it online and tons of people do it. The cakes keep their moisture. One thing I did learn, however, was that frosting frozen cakes sucks. I thought it might be easier to deal with them because they'd be more solid - but no - it just freezes the frosting as you spread it on top, and then to make matters even worse - the cake has to totally thaw before the frosting will "crust" (for smoothing purposes) because otherwise you get tons of condensation and the frosting is still tacky. This was a giant pain and I learned my lesson - either frost/finish the cake totally and then freeze, or totally thaw the cakes before filling and frosting them. It's always good to learn lessons and I ended up working it out in the end.
There was more work to be done in advance - the lobsters. I gave up the idea of carving out a lobster from a cake and making that the groom's cake.. first off, lobster bodies aren't very big and it wouldn't serve many people. Mainly, I haven't made my own fondant, the storebought stuff tastes yucky, and I didn't have enough time to try it out, knowing that a full lobster body cake would require a smooth fondant finish. So, I had decided to just do a "seascape" cake with a lobster on top.

Then my mom said "did you see that Cake Boss last night?" and apparently Cake Boss had a request for a lobster engagement cake and Buddy made a pair of lobsters - a bride and groom - for on top of their cake! I can't find a full picture online but here's one from
TV News Reviews Blog which is just showing the "groom lobster." I didn't think I'd use the idea at first but after a few days, I thought it would be a more cute groom's cake. (I must admit, I like my lobsters better than Buddy's... no offense Buddy!)
Cake Boss was also an inspiration to try out modeling chocolate. I had never heard of it before that show this summer, as many other cake artists also admit, and many of us have tried it recently. I also got a lot of information about it from Emily of
Cake Is Life who uses modeling chocolate for many of her recent beautiful confections! You basically take any kind of chocolate (dark, milk, white, colored candy melts), melt it, and add some corn syrup, (about 14oz chocolate to 1/3c corn syrup) and then spread it out in a pancake, and then knead it into a playdough consistency the next day. This worked out perfectly for me, and I was happy to note I found bright red candy melts at Sarah's Cakes and Supplies by my house, so I didn't even have to worry about color fondant or chocolate red. What I love about molding chocolate is that it hardens and firms up right away, but if you heat it with your hands or microwave, you can get it right back to playdough consistency and continue on. Fondant and gumpaste can be floppy or frumpy, and modeling chocolate tastes like chocolate... way better!

I spent Saturday making the bodies of the lobsters and it went pretty well. I used a picture of a real lobster as a model. Sunday I made little legs and tendrils (supported with toothpicks and wire) and created the veil and hat details to really make the lobsters look like a "real couple." I loved the way they turned out, and I had purchased some dark green and gold luster dust to paint on to finish the lobsters up with some definition. I left the legs and tendrils all separate with toothpicks inserted, so that they would travel separately and I would put the lobster together once I arrived at the reception site, at the last minute. I thought it would be safer to travel with everything disassembled.

I also made seashells and starfish out of some leftover fondant I had, and I painted them with the green and gold luster dust and made indentations with a toothpick to make them as realistic as possible. I loved the way they turned out. I packed up the lobster pieces and seashells in two shoeboxes lined and layered with papertowels and parchment paper. This traveled very well in the car.
I used vanilla cake for the wedding cake with my typical buttercream icing and raspberry filling, and the lobster cake was made from red velvet cake. I had never made that before and it was quite stunning to see cake batter the same color as my kitchenaid mixer! Wow! If you haven't had red velvet cake, it basically tastes like chocolate cake.
I did get information about the wedding colors in advance from Clay - the bridesmaids were wearing black dresses with a white sash and the colors were black and white! The flowers were calla lillies but I had envisioned a two tiered wedding cake separated with a big section of flowers and topped with a bouquet of flowers... calla lillies are like a million dollars a piece so I decided to just go ahead with my own design. This meant bringing my own flowers, which was another fun project and I couldn't do it too far in advance. On Thursday before taking off for the U.P., I stopped by a florist for some white mums and went over to Nino Salvaggio's and saw they had a splendid selection of flowers... and a way better price than the stupid florist. The colors in my head were green, burgundy (burgundy was one of the original colors I was told about by Clay) and white. I got some hypernicum berries in a burgundy with lime green stems, some more mums in white and light green, some baby green hydrangeas, some cheerful daisies.. and well, here's the picture, you'll see... I liked the combination a lot. I put them in a pail filled with water and they made the trip up north without a problem!

I pre-filled and frosted my cakes and then froze them, hoping that would help them "keep" in the long car ride up there. Cakes take a long time to thaw so it worked out fine. By the time we arrived at the cabin in Iron River, the cakes were ready to sit out for 30 minutes after being unwrapped and the frosting crusted over nicely. This was the first time I tried the Viva method (using the ultra-smooth paper towel on top of a crusted cake to smooth it out with your hand) and I absolutely love this method. It is a million times easier and better looking than the hot water/knife smoothing method. All you need to do is buy Viva paper towels, gently lay them on top of your crusted buttercreamed cake, and use your hand to smooth the cake through the paper towel. Here is an example of a before and after on one side of the lobster cake:

See above, before the Viva Method - this is about as smooth as you can get with a spatula. See below for an after shot of the Viva Method - pretty smooth for buttercream!

Once at the lodge and after smoothing out the three cakes, it was time for my last minute decorations.

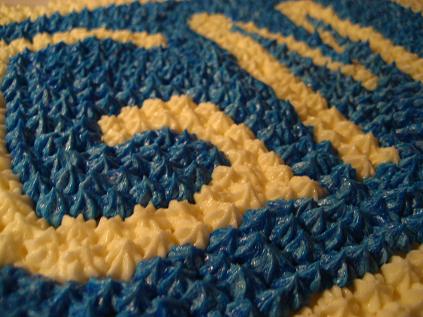
I wasn't sure what decorations I'd do on the wedding cakes - maybe swiss dots (groups of 3 dots in a triangle all over), or regular polka dots or swirls. I practiced on a plate and even know it was more work, I felt the swirls looked the most elegant. I was happy the way they turned out. The only other work on these would be at the reception site - placing the cakes, the tiers, the ribbon and flowers.

For the lobster cake, last minute decorations were only mixing up two colors of green buttercream and making seaweed all around the edges. The rest of the decorating would be done at the reception site - placing the lobsters, the seashells, sand, and accessories.

When the wedding day was finally upon us, I was happy to find the cakes were still in good shape (they took up most the space in the fridge that was also filled with a ton of beer as our cabin was the 'party cabin' as we had 8 people and most of the groom's men staying with us. After the wedding ceremony at 1, I came back to the cabin and started packing up between 2:30 and 3. The reception site at the Iron River Country Club would be open for guests at 5 so I had a good hour and a half to put everything together.

Gwen, Tom's wife, was the unlucky one who volunteered to come help me with setting up the cakes and I truly appreciated her help. We had lots of stuff to carry in and she kept me on track when I would tend to "try to keep adding more flowers" and fiddling with things in general. Thanks again Gwen, you're the best! I was definitely nervous as this prep time was the culmination of 2 months of planning and about 2 weeks of work.

I had made a detailed list of where to start - unpack everything, place decorative ferns on the table (thanks Grandma for the ferns), place mom's revolving silver platter cake stand, take out cakes, center tier legs into bottom cake, tape top cake onto tier, add ribbons, place flowers, etc.. just in case I got too nervous to know what to do next. I love lists. It worked perfectly.

We spent a long time putting flowers on the wedding cake (and of course I had lost my scissors and the ones we borrowed were terrible which also made cutting the ribbon difficult, hence the quadruple pinning on each tier to cover up mismatched ribbon seams) but finally we got to a point where even I was satisfied - "Okay Gwen, you're right, it's as good as it's going to get! We're done!"

 I recently had the honor of creating a wedding cake and a groom's cake for the wedding of one of The Husband's best friends, Clay, and his fiance Sarah. There were a number of challenges with this project, first and foremost - I've never made a wedding cake or groom's cake before!!!


 Gwen, Tom's wife, was the unlucky one who volunteered to come help me with setting up the cakes and I truly appreciated her help. We had lots of stuff to carry in and she kept me on track when I would tend to "try to keep adding more flowers" and fiddling with things in general. Thanks again Gwen, you're the best! I was definitely nervous as this prep time was the culmination of 2 months of planning and about 2 weeks of work.
 I had made a detailed list of where to start - unpack everything, place decorative ferns on the table (thanks Grandma for the ferns), place mom's revolving silver platter cake stand, take out cakes, center tier legs into bottom cake, tape top cake onto tier, add ribbons, place flowers, etc.. just in case I got too nervous to know what to do next. I love lists. It worked perfectly.

 The bride and groom seemed to love the cakes and Clay made a nice announcement to everyone in the country club getting food that I was the cake decorator, as they could all view it while passing by to get their food. I was very pleased with how everything turned out and was just happy to get everything up there safely and put together without any major hitches! It was a super fun project, I learned about a lot of new techniques, and thanks to Clay and Sarah for the fun adventure and congratulations!
Well done! Both the cakes look great, your hard work paid off!
ReplyDeleteWow, those are fabulous!
ReplyDeleteThis is AMAZING! I am going to have a lobster cake for my groom as well! It is reminiscent of a Friends episode for me. You did a fantastic job and I was happy to find an image online to show people what I want!
ReplyDeleteI've been thinking of a great groom's cake. This lobster cake hits the spot. The groom loves lobster (could eat it every day) $$$$
ReplyDeleteThanks for the great photo's and tips. I'm going to make this for him.
wow! great cakes! LOVE IT!!! what kind of cake stand did you use for the flowered cake?? I am searching for one so i can make one for my friend!
ReplyDeleteThe silver cake stand is from an old appetizer/lazy susan set my mom had. It came with glass dishes that interlace on top of the silver tray, and the tray twirls around... I was looking for a pretty cake stand too but those big silver ones that some people have are super expensive! I was lucky to have this one in my cupboard. Sorry I don't have any store information on where to get it, it was probably a wedding gift for my mom 40 years ago or something! :)
ReplyDeleteUnbelievably gorgeous!! It almost seems a shame that they had to get eaten.
ReplyDeleteThese cakes are fantastic! I just became interested in decorating cakes a little more than a year ago and like you, I've taken one class and learned everything else from the internet, word of mouth, and trial and error. You are such an inspiration! Thank you for documenting your projects so beautifully.
ReplyDelete